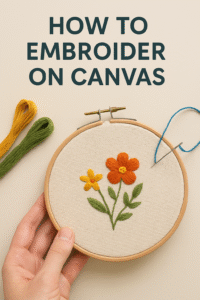
Canvas is one of the most versatile and popular fabrics today. Its use ranges from fashion to utility items such as tents, shoes, clothing, and a painting surface. One of the popular uses of canvas fabric is as a base fabric for embroidery. When done well, the embroidery design will look wonderful and hold fast for years. This article will focus on how to embroider on canvas?
Canvas has a long history of use as an embroidery fabric. The durability, weave, and strength of the fabric are some of the obvious features that make it ideal. Advancements in the embroidery and textile fields have allowed for even better works in this space.
Several types of canvases have great use in embroidery. This article will look at some of these and discuss how to best handle, embroider and display canvas.
Canvas Embroidery Stitches
Contemporary embroidery on canvas uses threads and a wide range of stitches to achieve different effects. The most common stitches on canvas include:
- The Satin Stitch
The satin stitch gives a smooth effect, and you can work it horizontally in either direction. If you want to create a check effect, you can also work the satin stitch in blocks.
To make this stitch, bring the thread to the fabric surface, count the holes you want to cover, move the thread to the underside vertically and bring it back to the fabric surface where the original stitch started.
- The Florentine Stitch
Sometimes referred to as the Hungarian point, this stitch is created by moving in a zig-zag manner and creating a wave effect. The stitches you sew will need to be parallel. Using threads with close colors can also give you a flame effect.
- The Brick Stitch
The brick stitch is so aptly named because it creates a brick-like effect. It is a strong, basic, and versatile stitch. The stitches are equal in length, although the first row will have some half-length stitches to kick off the pattern.
In the first row, you work while alternating full and half-length stitches, while in the second row, you continue stitching full-length stitches.
- Cross Stitch
Cross stitch is among the most popular forms of counted thread embroidery. X-shaped stitches are laid out in a tiled pattern and used to create embroidered images.
You can determine the size of the cross stitch by the number of holes that you cross. The fewer the holes, the smaller the stitch, and the larger the holes, the larger the stitch.
When working with the cross-stitch, it is important to remember that the first stitch for each of the crosses should face the same direction (right), while the second stitch of each cross should also always face the same direction (left)
- 3-D Crosses
3D crosses are a fun stitch that you can use to add texture to your work. You can also magnify them to whatever size you like. To do this stitch, bring your thread to the surface and cross it diagonally as far as you would like, go underneath the canvas, and back to the canvas surface a thread above the starting point.
Return diagonally into the canvas a thread below the previous stitch. Following this will rotate the stitches until you have filled all the holes near the square.
What Size Needle to Use for Embroidery
Today’s embroidery needles are a far cry from what early embroiderers used. Needles today are specialized for specific purposes and specially engineered to best suit that purpose. Embroidery needles also come in different sizes, and it is up to you to choose the right-sized one depending on your work.
You can find the size of an embroidery needle by the numbers written on it. The two sets of numbers represent both American and European sizing, with the American one running from 8 to 19 and the European one from 60 to 120. The size of the needle you use for embroidery will depend on:
- The Fabric Weight
You can get the canvas in different weights. A standard rule is that heavier-weight fabrics will require larger needle sizes while lighter fabrics will require smaller ones.
- The Needle
The thread you are using also determines the needle size. A general rule is that the thread you use should not use more than 40 percent of the needle’s diameter. If the thread doesn’t smoothly pass through the eye, it could present problems while stitching.
You can also know if you are using the wrong-sized needle if you are experiencing some common problems. If the needle breaks easily and often, you likely chose a too-small needle as it could not handle working with the thicker fabrics.
If you frequently get large, unsightly holes and snags, the needle size you are using is probably too big. Although the needle will likely remain undamaged, your work will not.
How To Embroider Canvas Tote Bags?
Embroidering your tote bag is a great way to bring new life into it and make it look interesting and new. It is also a clever way to customize it and show off your style. Fortunately, embroidering your tote bag is a relatively simple process you can accomplish with a little patience. Here are the steps to follow.
Step 1: Choose a Design.
Deciding just to wing it and start embroidering without preparation is probably one of the worst mistakes you could make. Think of the design you would want on your bag and prepare a plan to execute it.
You can find an immeasurable number of designs online that you can adapt for your bag. Conversely, if you feel confident enough, you can create the design yourself and give your bag a bespoke look.
Step 2. Transfer the Design
After settling in the design, you want, you can then go ahead and transfer it to your bag. If you are skilled at drawing, you could pencil out the design directly onto the bag.
Otherwise, you can transfer the design to a water-soluble embroidery paper, whose adhesive backing allows it to stay attached to the bag and keeps the design immobilized as you stitch. Trim any excess paper away from the bag but leave around an inch of paper around the embroidery design.
When ready, pull the backing and get the design on your fabric surface.
Step 3: Stitch It Out!
If you are embroidering by hand, this is the time to hoop your fabric. A taut fabric will help you avoid things such as design distortion. Use a needle that will easily pierce the fabric and the soluble backing. Stitch carefully along the design, following the outline you made.
Step 4: Finishing
After securing the last stitch, soak the tote bag in warm water to dissolve the water-soluble backing and leave the design. You will then need to wash the bag, dry it and iron out any wrinkles. And your customized tote bag is now ready for use!
How to Frame Embroidery On Canvas
One of the popular ways to display embroidery is by having it stretched over a wooden canvas frame. It gives the embroidery a finished, professional look that you can hang high on your wall or lean it on a table against the table. We discuss the full process on how to achieve this in detail below.
How To Mount Embroidery On Canvas?
Apart from displaying your work in an embroidery hoop or placing it in a frame, mounting it on canvas is also a great way of showing off your beautiful work. Although the final result is not archive-worthy, it does give it a professional look.
Step 1: Gather the needed equipment.
Preparing for any procedure is perhaps just as important as the process itself. It will allow you to move faster and work with more surety and precision. First, you will need to gather the needed tools and materials. These include:
- A pair of scissors
- A needle and thread
- A blank and stretched canvas
- Fabric glue
- The finished embroidery piece
Step 2: Trim the Embroidery Fabric to Fit
If you plan to mount the embroidery on canvas, you must plan for this straight from the embroidery process. Position the embroidery in such a way that you will have extra fabric on all sides.
Cut the fabric so that you will have extra fabric to use for mounting the embroidery. If you are working with a standard canvas, you will need a border of at least 2-inches all around, though you might need a larger border for thicker canvases.
Step 3: Center the Embroidery
After you have trimmed the fabric to the right size, it is vital that you first center the embroidery on the frame. Smooth out the fabric and see if the lines meet up well.
Before you secure the fabric on the back, ensure that you have positioned the embroidery design exactly as you would want it to be when the fabric is secured.
Step 4: Secure the Back of the Canvas.
The methods you can use to secure the back of the canvas are as listed below.
- Lacing the Back of the Canvas
First, cut around one to two meters of thread, thread your needle and double the thread. Beginning from the middle of the canvas sides, take the thread through the fabric, taking care to do an extra stitch at the starting point.
Lace the back by stitching through the wrapped fabric on opposite ends. Start from the middle of the sides and work your way towards the edges, pulling the fabric taut as you go. We recommend that you sew each stitch at least a quarter to a half-inch from the edge.
Sew a small, extra stitch at the end to help hold the lacing tight, tie a knot, and trim off the thread’s end. You can then repeat this process with the two opposite remaining sides.
After all this, you will still have some loose fabric left at the corners. Just tuck this fabric in, pull it tight, and stitch it up. Repeat the folding and stitching process for all the corners and trim away any excess fabric that you have.
- Tacking it Down
The basics for using tacks are the same; fold the excess fabric over to the frame’s back and then flip it over to start securing the back. After flipping the frame, start by tacking down two to three points on each backside.
Check if the embroidery design is centered correctly. You can then go on and tighten the tension on each side and add in more thumbtacks. Start by tacking in the longest sides before you move on to the shorter sides.
Doing this allows the fabric to get straightened first in one direction and then in the other. It is also important to pause now and then to ensure that you have not distorted the image on the front. For the corners, just fold the fabric in as you did when using thread.
Step 5: Cover the Canvas Back With Felt.
To make the covering, start by placing the canvas on a piece of felt, tracing out the shape on the felt, and cutting it out. After cutting out the felt, use fabric glue to attach it to the back.
You can then use a traditional picture hanger to display the frame or lean it against the wall! After the embroidery fabric is secure, you can choose to leave the canvas open and display it, or you can choose to conceal the back.
How to Embroidery Plastic Canvas
Plastic canvas, also known as vinyl weave, is a lightweight plastic that has regularly-spaced holed like embroidery canvas.
It is typically used as a foundation for canvas work embroidery and needlepoint and has many excellent properties. Before we get into how to embroider plastic canvas, it is first important to understand its properties.
So, why choose plastic canvas for embroidery?
- It is rigid
The stiffness that plastic canvas gives makes it a great medium for embroidering without a hoop. This feature makes it a great medium for teaching needlepoint and cross-stitch to children as it eliminates the need for a hoop. It also allows you the freedom to easily create standalone 3D works of art.
- Durability
Like all plastic, plastic canvas is durable, making it a great material for projects that you expect to handle regularly, such as coasters and bags. It is also great if you want something that will last a long time on display.
It also does not get distorted, and thus if used for cross stitch, each X remains in a perfect square. No matter how tight you sew your stitches, your work will not get skewed.
- It does not fray
Plastic canvas will not fray at the edges, unlike cloth. This feature will save you a lot of the time and effort you would use to tape the edges or whatever method you use to prevent fraying.
- Affordable
Plastic canvas is inexpensive, thus making its acquisition easy.
So, how do you embroider plastic canvas?
Step 1: Gather the Needed Equipment.
As with any sewing process, preparation is key. Placing all the needed materials together near you will save you a lot of time and effort. The materials you will need are:
- The canvas
As is quite obvious, the first thing you will need for this project is the canvas itself. You can buy plastic canvas in sheets that are approximately 11 by 14 inches. A great feature of this material is that it is available in various colors.
However, the most popular is the clear opaque, which blends in with the stitching excellently, rendering it almost invisible. You can also get it in different grid sizes, with the most popular being the 7-count.
- Needle
For embroidering on plastic canvas, a basic yarn needle is all you need. Ensure the needle has a blunt tip. Since it will not be piercing fabric, a sharp tip will not be necessary.
The needle’s eye also needs to be long enough to hold the thread while thin enough to pass through the canvas easily. You can get these needles in either plastic or metal.
- Thread
One of the reasons why embroidering on plastic canvas is so economical is that it does not require any specialty thread. Instead, you can use medium-weight yarn or doubled lightweight thread. If you can’t easily choose between the two, just try a few stitches with both and choose the one you like best. A great way to accumulate different yarn colors is to ask for little odds and ends from any knitting friends you have.
- Scissors
You will also need a regular pair of scissors to cut the canvas, although we do not recommend fabric scissors. You can also get a smaller pair of scissors for cutting the thread at your discretion.
Step 2: Stitching the Design
If you are doing cross-stitch, you will need to follow the gridded chart. The chart will indicate to you where to start and stop stitching.
You can stitch the designs using yarn or cotton embroidery floss for backstitching and other accenting details. When working, other stitches you can use include the backstitch, straight stitch, running stitch, and the French knot.
Step 3: Finishing the Project
Once you finish stitching, you can then cut away the excess canvas. Ensure that you cut your canvas between the bars and leave a plastic bar between the stitches and where you cut. Cutting between the bars will allow you to have a decent amount of material left for overcasting the edges.
After you have cut the canvas, use the joining and overcast stitch to finish the project. This stitch is as simple as the stitch coming up in one hole, over the border bar, and in the next. For the joining stitch, you just need to align the holes and edges before stitching.
Some plastic canvas projects will require extra finishing techniques apart from the joining and overcast stitches. For most projects, you can cut out felt and secure it to the back using felt glue.
Tips
- For a more finished and professional look, trim the rough edges from the canvas and ensure that you cut off the corners at an angle.
- When you start stitching, begin on an uncut piece of material to prevent any snagging thread. You can also choose to cover the canvas edges with masking tape.
- If you need to wash the plastic canvas, soak it in a sink with warm water and a little dish soap, rinse it, and let it sit in a bathtub overnight to drain and dry overnight.
- Do not get a colored canvas unless the pattern specifically requires it, as it may allow the grid to show through if the yarn does not cover it.
Tips For Embroidering On Canvas
Canvas is a pretty popular base for embroidery and can work as a beautiful background for your embroidery work. Here are tips to help you create clean embroidery designs on canvas.
- Place the Embroidery Holes Carefully.
Hole placement and spacing are truly critical when embroidering on canvas. You can put the holes together, but you will have to be careful about it. If you put the holes too close together, you run the risk of them joining to form one big hole or tearing the canvas.
Also, do not put multiple threads through the same hole as it can cause tears on the canvas. Canvases are not as flexible as some other fabrics, so you will have to work on them creatively.
- Be Confident With the Hole Placement
This tip goes hand in hand with placing the hole carefully. Once you have made a hole in the canvas, try not to back out. While covering the holes on canvas is possible, it is not as easy to do as with other fabrics.
However, if you need to move the hole, you can try patting the canvas near the hole back into place or covering it with embroidery thread.
- Pull Carefully
Apart from the hole spacing, the force on the thread is also quite important. Pulling the thread too hard will cause a slight tear or a larger hole than you intend. Again, the canvas is not very flexible and will tear if handled roughly.
When pulling the thread through, be sure also to keep it straight to keep from having knots. Another thing to watch out for is to avoid tangles in the fabric, which can cause you to pull too hard and tear the canvas.
On this note, keep the length of the stitching thread reasonable since an overly long thread is more likely to tangle.
- Sketch the Design First
One of the best features of the canvas is that you can easily sketch a design on it, and erasing the design is also easy. While you can also do this on fabric, it is much easier on canvas. Even if you have painted the canvas, you can also lightly sketch over it.
Sketching the design before you start stitching helps you work faster when you do start stitching. It also helps you avoid simple mistakes that would lead you to poke unnecessary holes in the fabric and weaken it.
How to Stretch Embroidery Over Canvas
Even after working embroidery on a hoop or frame, it will likely have distorted as you embroidered. Steam stretching the canvas will help it gently get back into shape.
Place a towel over the ironing pad, lay the embroidery face down, put the iron on steam, and hold it over the back of the embroidery, steaming the fabric.
After softening the fabric and stitching by steam, stretch it into shape. Place it back on the towel, and this time press the iron over the fabric for it to hold its shape.
You can then mount the embroidery to a canvas and secure it using the methods discussed above.
How to Embroider Letters On a Canvas
Embroidering letters on your fabric is a great way to add a personal touch to your projects and an important skill to add to your repertoire.
Once you familiarize yourself with the basics, the rest should be a breeze. Below are some features of the font you should consider when embroidering letters.
- Font size
If you plan to embroider in smaller font size, keep it simple. Smaller letters are harder to read, and complex text will just compound on that.
- Legibility- If your text must be readable, it is better to keep to simpler font styles. You can practice the font on a cloth scrap before using it, as what looks good on paper won’t necessarily look good on cloth.
- Aesthetic- Does the font’s appearance go with the theme of what you are making? For example, when embroidering wedding items, most people use cursive and a more personal, casual font for a fun thing.
Embroidering the letter themselves is also an easy task. To start, get the letter you want, and sketch it carefully onto the canvas. Then, with your threaded needle, start following the lines of the letters you’ve drawn.
You can download beautiful letter fonts online and then trace them to the fabric, or you could also use a machine to trace out the letters.
To practice your lettering, start with a five or six-letter word in a basic font, and as you get better, you can start practicing with longer words that have a more complex font and eventually whole sentences and more.
While embroidering instinct is to follow the same path as when you are writing, this will not always work. You can instead try first to follow the straight edges and then the curves.
Tips
- End the thread properly before you start a new letter. (you may not need to do this if the font is very small, you need to connect the letters as in cursive, or the letters are very close together.
- When stitching around corners, shorten the length of your stitches.
- Determine the path you will follow before you begin stitching.
- If you need to stitch a letter in two parts, turn the work over and wrap the thread over the existing stitches until you get to the new starting point.
How to Embroider Letters on Canvas?
Apart from images, letters also have a huge role to play in embroidery. A romantic cursive font can work well for a wedding, with stronger, more basic fonts used for formal meetings.
With the different fonts and styles available, you can use them to achieve truly amazing things. We have discussed in detail the procedure for embroidering letters as well as some helpful tips above.
What Needle and Thread Should I Use for Canvas?
As canvas is a heavy, closely woven fabric, it is necessary to use an appropriately sized needle to prevent needle breakages. We recommend using a universal needle-sized 90 to 100 or a specialty jeans needle.
If you want to do some topstitching, you could use a topstitch needle and thread to add final decorative touches.
For the thread, a heavy-duty polyester, cotton, or cotton-wrapped polyester would work well for canvas. Remember to adjust the bobbin or tension settings to suit the thread you use on a sewing machine.
What Can I Make With Canvas Fabric?
Canvas is arguably one of the most versatile fabrics and has several uses ranging from utility items to home décor to high fashion. Some of the things you can make with canvas are:
- Bags- Canvas is especially popular in making bags. You can use it to make shopping bags, tote bags, and backpacks. The water resistance and durability of canvas make it great for this.
- Shoes- the flexibility and durability of canvas make it an excellent choice for making long-lasting footwear.
- Paintings- Perhaps the most famous use of canvas has been in using it as a painting surface. The endurance of canvas paintings from centuries ago attests to their suitability for this purpose.
- Clothing- The water resistance and durability of canvas make it great for outdoor clothing.
- Furniture- You can also use canvas as an upholstery fabric owing to its strength.
How to Hoop a Canvas Bag for Embroidery
Hoops are a great help when embroidering as they keep the fabric taut and prevent the designs from getting distorted. While tote bags are fun to embroider, they are not large enough to move them back to allow you to embroider freely.
You can easily solve this by taking out the side seams to have enough clearance. After removing the side seam, turn the bag inside out and hoop the stabilizer.
Your bag will essentially ‘float’ over the stabilizer using a fabric spray adhesive. Make sure that you center the bag over the hoop where you want the design centered.
Fold back the bag sections to allow you to spray the adhesive on the stabilizer. Roll the canvas bag out of the way and clip it to keep it still.
You can then take the hooped bag to the embroidery machine and stitch the front, ensuring that the back is not in the way. Then remove the bag from the hoop, leave it inside out and redo the seam you ripped.
Final Thoughts: How to Embroider On Canvas
With hundreds of embroidery stitches for canvas, the possibilities for the decoration of this versatile fabric are near endless. When done well, embroidery on canvas can be a piece of art that lasts for years to come.
Its versatility allows you to display it as a wall hanging or stitch it into an everyday item.
As mentioned above, with the right embroidery tools and materials for the canvas, stitching a design is as simple as outlining it and then stitching it.
Thank you for reading this article, and we hope it has been informative. Please feel welcome to leave any comments, suggestions, and questions in the comment section below.