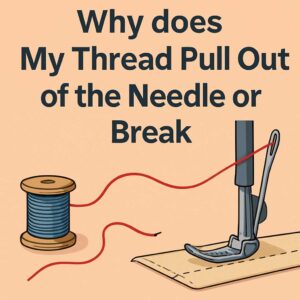
As a sewing or embroidery enthusiast, you know that you will experience minor hiccups from time to time. In addition, a sewing project may include moments where the thread breaks or pulls out of the needle unexpectedly. So, many sewists wonder, Why Does My Thread Pull Out of the Needle or Break?
The thread jumps out of the needle because of thread tension. Also, if you use a poor-quality thread, thread breaks are inevitable. Therefore, begin your projects with the right thread tension and a good quality thread. In addition, ensure that the needle has no burrs as they can cut the needle.
There are many more reasons for unthreading. Continue reading this article for more insight and advice on handling such awkward sewing moments.
How Do I Stop My Thread from Coming Out of the Needle?
Various remedies can help keep the thread from coming out of the needle. They include adjusting the thread tension, taking correct threading measures, and ensuring that you have the correct needle.
Check out the list below and get a quick fix to your thread problem.
- The machine will keep unthreading when the thread tension is too low or high. Hence, adjust it and see if you will fix the problem. For instance, you can tighten the thread if you have loose stitches.
- A wrong-size spool is a recipe for constant unthreading. Thus, ensure that you correctly install the spool. Also, check if it can spin freely without shaking or messing up the thread.
- The general machine threading may also cause the thread to jump out of the needle. So, it would be best to pay attention during the threading process and ensure that the thread goes through all the right holes and loops.
- Check when the pull out of the needle because you may have used a small thread. Then, pull at least 10 to 15cm thread from the bobbin and upper thread before operating the pedal.
- Also, it would be best to begin at a slower speed while holding the excess thread in one hand. This move will help you keep the thread in the needle as you begin sewing.
- The thread will pop out if the needle is in a low or medium position as you progress with stitching. Therefore, be sure to secure the needle at the highest position.
- The needle may blur or bend. So, check the needle’s groove and tip and ensure that you install it correctly. Then, read through the sewing unit’s manual guide to confirm that you have the right needle.
- Thread bumps, knots, and other related irregularities may cause tangles in the needle. Hence, the thread can escape the needle as you apply sewing pressure. So, get a high-quality thread for all your projects.
- You can expect unthreading if you mount the thread on a foam spool. Therefore, it would help to stay away from old threads and thread remains in your grandmother’s old shoebox.
- A wrong thread insertion procedure also contributes to unthreading. It mostly happens if you insert the thread from the needle’s back. Hence, ensure you thread the needle from the front toward the back. Also, you can get self-threading needles as they are an easy way out and accommodate even the visually impaired.
- You will likely deal with unthreading if the footer has scratches that hit the needle as it sews. Also, if you are embroidering or using zig-zag stitches, the thread will pop out because of a damaged footer. So, inspect the footer and change it immediately if you notice any damage.
- Have you checked the bobbin case? It also touches the needle, so you need to keep it clean. Also, look out for lint and any loose parts, as they can cause thread-related problems during sewing.
- An incompatible or unoriginal bobbin will also give you unthreading problems. Therefore, it would be best to use the machine’s original bobbin. Also, if you must replace it, ensure you get a compatible one.
If the above tips still do not get the machine to work, please take it to a repair shop. The store will know the unit model, and thus, they can easily identify the issue.
How Do You Know What Tension to Use When Sewing?
You will get an ideal sewing machine tension when you balance the bottom and top threads. So, avoid loops on the fabric’s top or bottom. Also, the stitches should be even and uniform on both sides.
However, before you go right ahead and adjust the tension dial, there are other issues to deal with for perfect balancing. Let’s check them out.
- Correct Threading
Always thread the machine properly before you begin stitching. If you have doubts about the technique you used before, please rethread the bobbin and top thread. Also, make sure that the thread goes through the tension discs.
- Needles
Bent or blunt needles interfere with the tension. Therefore, examine the sewing machine needle for breakages, bends, or bluntness and replace it immediately if it is faulty.
Also, make sure that you insert the needle correctly on its holder. The needle’s flat part should be at the back for perfect sewing.
In addition, match the needle with the fabric weight and type. For instance, leather requires a leather needle with a heavy gauge.
- Thread Quality
Cheap thread brands are uneven and break easily, interfering with your smooth sewing session. Thus, shop for quality thread such as Coates, Gutterman, and Rasant.
In addition, ensure that you get a matching thread for the bobbin and top thread. The threads’ quality, brand, and weight should be uniform to maintain a balanced tension.
Fortunately, you can pick different colors for your project as long as the fundamental aspects are checked.
- The Bobbin
The bobbin is another accessory that can tamper with your tension. Therefore, be sure to wind the bobbin evenly, check for snags, and confirm that it is secure in the bobbin case.
You can check the machine manually to adjust the bobbin or bobbin case.
- Dirt
Fluff build-up can upset the whole sewing unit, ultimately leading to unbalanced tension. Hence, examine the machine’s wheels, bobbin, and throat plate and use a small paintbrush to sweep any fluff.
Also, fluff accumulates in the needle’s eye. So, consider checking the needle too.
- Tension Dial Settings
Assess the tension dial to confirm that it is in the correct position. You may have altered the settings and forgotten to restore them to their default mode.
In addition, the dials are inviting to children, and they may change your settings. Therefore, always check the dial settings before you sew and set them depending on your fabric requirements.
- Top Thread Caught
If the top thread sticks around the spool base, you will experience a tight tension. Hence, check the thread for tangles and knots, and ensure that it moves freely around the spool.
- Sewing Machine Damage
If you still have an unbalanced tension after the above troubleshooting measures, please get a technician’s services. In addition, the throat plate may have nicks that snag the bobbin thread. The technician will buff them and save you from buying another throat plate.
Why Is My Top Thread Not Sewing?
The top thread jams if it does not reach the bobbin or lock properly with the bobbin thread. Also, if the upper tension is too tight, the thread may jam, leading to skipped stitches.
In addition, the thread may not sew if it sticks on something between the thread spool and needle. This scenario makes it too tight for the needle to get the bobbin thread. However, you should not panic when it happens, as proper threading sorts the issue instantly.
When Should I Adjust the Tension On My Sewing Machine?
You should adjust the sewing machine tension when the knot at the bottom and top threads show on the fabric. Also, when you notice that the knot is visible on the fabric’s right or wrong side, it is time to make tension adjustments.
For example, loosen the upper tension and tighten the lower one if you can see the knot on the right side. On the other hand, if the knot is on the wrong side, tighten the upper tension and loosen the lower one.
Additionally, you may need to adjust the tension even when they are balanced. You may find that the two tensions are too tight, which causes the thread to break easily during stretching or puckered seams.
Also, if the tensions are too loose, the seam is prone to a gap and will expose threads between the sections.
What Setting Should My Sewing Machine Be On?
Sewing machines have the bobbin thread tension at the factory setting, and you do not need to adjust it at any point. So, if you need to change tension, you work with the top thread tension.
The general tension settings run from zero to nine. This wide range accommodates various fabrics and is thus very beneficial to projects. However, the machine’s default tension setting is usually at 4.5, which is suitable for many materials.
In addition, zig-zag or wide stitches may cause the bobbin thread to pull through to the top and cause bunching. Here, loosen the tension and set it between three and four. Then, the fabric lies flatter, and you can continue delivering perfect seams.
Lastly, different sewing machines vary in how you make the settings. Thus, it would be best to seek guidance from the buyer’s guide. Also, the tension settings vary with thread thickness and fabric weight. So, ensure that you consider these elements during the adjustments.
What Tension Should I Use for Cotton?
Tension settings vary widely based on the material you use. However, you must balance the lower and upper tension settings for a perfect stitch.
Cotton is a medium-weight material and requires a moderate tension setting. You also need to strike a balance between the upper and lower tensions. Therefore, consider a three or four for the upper tension.
In addition, control the lower tension by turning the bobbin case screw. Use ¼ of a turn to the right or left. Then, proceed to make more adjustments till you get the correct settings.
Finally, always test the tension each time you make setting changes. Use scrap cotton pieces to avoid ruining the fabric. In addition, you will notice that the seams will lie flat on the upper and lower sides of the seams once the tension is perfect.
Conversely, if the seam has pucker or lumps, continue making adjustments until you get the perfect seam.
Why Won’t My Sewing Machine Needle Go Up and Down?
The needle jams because of a broken belt drive, a disengaged clutch, or an internal drive gear failure. To get the needle moving, consider the following instructions.
- Engage the handwheel for a disengaged clutch. Then, if the needle remains stationary, unplug the sewing machine and check the drive belt.
- Replace the belt drive if you confirm any breakages or damages.
- If the belt is okay, check the internal drive gear. However, getting an expert to handle the gear failure would be best.
How Do You Adjust the Tension On a Bobbin?
Embroidery enthusiasts will tell you that proper bobbin tension is fundamental for excellent embroidery results. For example, you will deal with unwanted bobbin thread on your garment if the tension is too tight. In addition, you may get frequent thread breaks that waste energy, money, and time.
Suitable bobbin tensions should range from 18 to 22 grams. But if you must, you can only go up to the 25-gram limit.
Also, when making satin stitches, reveal ⅔ top thread color and ⅓ bobbin on the embroidery’s underside.
Even with perfect bobbin settings, you may still get the bobbin thread on top of the fabric. So, examine other factors such as improper thread tensioning, broken needles, or damaged bobbin cases.
On top of that, changing bobbin tensions only require you to turn the screw on the bobbin case in minor increments. Imagine the screw as a clock and use 15-minute increments to loosen or tighten the bobbin tension. Then, test and adjust again until you get the correct stitch.
Why Does My Sewing Machine Keep Jamming Underneath?
Check out the following reasons to understand why the sewing machine will not work as expected.
- Accumulated Dirt, Lint, and Debris
The sewing machine keeps jamming if accumulated dust, lint, or debris clogs it. Hence, you can only solve it by cleaning the unit periodically. Also, take some time after a sewing project and remove the gunk stuck on the unit during the session.
In addition, ensure that you turn the unit off and unthread it before cleaning to prevent power and electricity accidents. Also, once you unplug the machine, you can do a thorough clean-up using a blowout or small brush.
A dirty bobbin can also lead to machine jamming, dirty thread, and eventually ruin fabric. Hence, it is an excellent move to clean it thoroughly from time to time.
- Low-Quality Thread
A poor-quality thread will always cause problems during sewing. For example, it causes lint build-up as it shreds. It is also prone to knotting and breaking, which slows down your work.
When you settle for poor quality, it may cost more than a thread. Therefore, get good quality thread for your projects and consider the fabric weight.
- Worn Out Metal Parts
You indirectly invite a machine jam if you can’t recall when you last oiled your machine. The moving machine parts suffer from friction during sewing, and they may wear out or break within no time. Thus, ensure that you oil the device’s metal parts regularly.
- Lack of Tension on the Upper Thread
Insufficient tension on the upper thread leads to tangles on the bobbin thread, which ultimately causes the machine to jam. Therefore, lift the presser foot and rethread the unit following the buyer’s guide.
- A Broken or Deformed Needle
Often, the sewing machine jams because of a broken or bent needle. In this situation, the needle stops the thread from going through the fabric. So, you cannot continue stitching.
Here, stop stitching immediately and get a new needle. However, ensure it is the correct type and size for your project and the machine.
- Faulty Feed Dogs
Your sewing machine will malfunction if the small teeth under the presser foot and needle are not working properly. These accessories pull the fabric through during the sewing process. So, when they break down, you cannot deliver ideal stitches.
Fortunately, the common reason for their malfunction is lint and dust, something you can take care of immediately. So, stop working, light the presser foot and do some cleaning. Also, lift them after the cleaning to allow for a firm fabric grip.
What Tension Should I Use for Thin Fabric?
Although the sewing machine’s default setting is 4.5 for most fabrics, it would be best to have a tighter one for lightweight materials. Fabrics such as chiffon and silk are delicate and require a combination of fine thread and tighter tension.
In addition, the tighter the tension, the lesser the tension disk space. Therefore, you need a fine thread that will pass through the narrow opening.
What Thread Tension Should I Use for Denim?
Denim materials require a looser tension, usually between four and five. You can use six as your setting, but it would be best not to exceed it.
In addition, the bobbin stitches will clear up until sic. Then, if you increase the tension, you won’t notice any significant improvement.
How Do You Adjust the Top Tension On a Thread?
The first step is to find the tension regulating dial as various machines position it differently. In addition, if you cannot find the knob, consult with the sewing machine manual.
Turn the knob so that the numbers on the dial increase if you want to increase the tension. Also, try ½ to one, then test with your scrap fabric. Then, continue making the turns until you can no longer see the bobbin thread on the fabric’s right side.
Additionally, the threads do not get even after many attempts, proceed to the bobbin tension adjustment.
On the other hand, decrease the top tension by turning the knob ½ to one lower. Then, test the stitches on scrap material. Also, if it does not correct the stitches, try fixing the bobbin tension.
The bobbin tension is easy to adjust as you need to turn the screw on the bobbin case by ¼ turns. Turn it left to decrease the tension and right to increase it. Then, repeat the process until the thread drops a few inches.
Why Is My Bottom Stitch Not Straight?
The bottom stitches are usually uneven when you pull the thread tightly on the underside. In addition, the situation may also arise when you have an incorrect top thread tension.
How a Straight Stitch Should Look?
A straight stitch looks perfect and does not pucker. Also, it has no width, and thus you use a zero dial setting.
Additionally, since each sewing machine has varying stitch width settings, ensure that you read through the buyer’s guide for more clarification. On top of that, if you can find the manual, consider a ½ inch seam allowance and use a ruler to confirm the measurements.
How Do I Fix Bobbin Thread Bunching Up?
Tangled bobbin threads and birdnesting are usually easy problems to fix. Therefore, they do not have to stress you when they happen.
Consider the following tips to fix bobbin thread bunching up.
First, thread the machine correctly and ensure that the thread passes through every thread guide on its way to the needle’s eye. It would be best to use the sewing unit’s manual if you have it.
Additionally, ensure that you read the device with the presser foot up so that it sits securely. Please note that as long as the presser foot is lowered, the tension is always engaged, and you will not set up the thread as required.
Then, change the needle if you still have a loopy bobbin thread. For optimum performance, be sure to get the correct one that matches the machine brand and fabric.
Also, the needle is an essential accessory that is cheap and easy to replace. Therefore, get replacements for damaged ones.
In addition, inspect the bobbin and thread it correctly if the thread tangles or is loose. Learning how to wind the bobbin properly minimizes this risk.
In addition, check the bobbin case and reinstall the bobbin. For this process, it would help to get more instructions from the buyer’s guide. If you cannot access the manual, you can also check free sewing tutorials online.
Finally, clean the machine and eliminate lint and dirt. Ensure that you adopt a maintenance routine to keep the unit running longer.
Frequently Asked Questions
- Which is the Best Needle to Use to Avoid Unthreading?
Several considerations come into play when selecting the most suitable needle. However, the fabric weight, thread type, and type of stitch are essential.
For example, you need a thick needle to handle the pressure if you have heavy fabrics. A huge needle is also suitable for thick threads.
Conversely, a smaller needle will deliver better stitches for delicate fabric and small threads.
- What Do I Do When the Needle Breaks?
First, cover up the hole with some fabric to keep the needle screw from loosening and falling into the bobbin compartment. Then, search for the broken pieces and get rid of them safely to prevent accidents.
Also, assess the fabric to ensure that there are no broken needles on top that can ruin it.
Finally, check the bobbin compartment and ensure that it is clean and free from the needle broken parts.
Conclusion: Why Does My Thread Pull Out of the Needle or Break?
Thread issues are a common hiccup for regular sewing. Also, if you are new to the craft, you will experience some problems too. On top of that, accidents do happen, and the thread unthreads. Therefore, it is prudent to have simple fixes under your sleeves for a rainy day. So, today we engage with the topic:
If you do not use the correct tension, the thread will pop out. Also, if you pick an old thread and needle, unthreading is inevitable. Incorrect threading keeps the thread loose, and thus, it can pop out anytime during sewing.
Luckily, the above issues are easy to fix. So, consider the tips in this article and keep your thread in place!